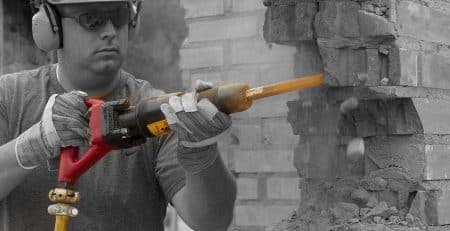
Breaker Steel Troubleshooting Guide
Breaker Steel Troubleshooting Guide: Diagnosing Failures and Preventing Damage
Introduction
When breaker steel breaks or wears down prematurely on a job site, it does more than just pause production, it presents a serious health and safety risk to the operator.
Interestingly, statistics show that roughly 90% of all breaker steel failures are caused by operator misuse or incorrect equipment handling, while only 10% stem from genuine manufacturing faults. In this troubleshooting guide, we will analyze the visual symptoms of tool failure, what causes them, and how you can prevent them.
Part 1: Operator-Driven Failures (90% of Cases)
1. Mushrooming
- The Visual Symptom: The tip or working end of the steel flattens out, spreads, and takes on a “mushroom” shape.
- The Cause: This is caused by insufficient contact or downward pressure between the steel and the working surface. When the steel is allowed to loosely “ride” on the surface, the impact energy turns into intense friction heat, completely destroying the steel’s original heat treatment.
- The Danger: This idle energy can also cause ‘blank firing,’ which damages the underside of the steel’s collar, risking a catastrophic snap right below the collar that can injure the operator.

2. Leverage Snaps
- The Visual Symptom: A clean break occurring right below the collar or straight through the middle of the steel body.
- The Cause: Using the breaker tool as a crowbar or lever to pry away material. Breaker steel is designed purely for percussive force to fracture material; it should only be used to clear material after it has already fractured. Levering forces the steel to bend past its mechanical limits.

3. Worn and Blunt Tools
- The Visual Symptom: Rounded points on moil steels or dull edges on chisels.
- The Cause: Failing to regularly sharpen or regrind the steel. Operating with blunt tools drastically reduces performance, causes accelerated tool fatigue, and sends harmful vibrations back into the breaker, causing premature equipment failure.

4. Thermal Shock (Freezing Temperatures)
- The Visual Symptom: Sudden, premature shattering when working in sub-zero environments.
- The Cause: Forgetting to warm up the steel tool before beginning work in freezing ambient temperatures. Cold steel becomes highly brittle and is prone to immediate failure upon striking hard surfaces.
5. Incorrect Shank and Bushing Alignment
- The Visual Symptom: Severe damage to the equipment’s internal chuck or premature fracturing of the shank.
- The Cause: Using non-matching competitor steels with incorrect dimensions or angles. Substandard competitor steel often features irregular impact surfaces, off-center points, or rebar on the shank area that quickly destroys the machine’s bushings.

Part 2: Manufacturing Faults (10% of Cases)
If you are operating your equipment perfectly and still experience a break, it could be a rare manufacturing anomaly. Look for these distinct patterns to identify a factory defect:
- Carbon Segregation (Faulty Steel): If carbon segregates improperly during raw steel manufacturing, it creates internal weaknesses. The fracture face will often display a distinct, small, darker center core. This structural defect usually causes the steel to break above or below the collar within just a few minutes of its very first use.
- Forging or Quench Cracks: These are structural cracks that happen during the rapid cooling phase of factory production. They are identifiable by a small crack surrounded by a discolored area right at the point of failure.
- Incorrect Factory Heat Treatment: If the hardening process of a cutter blade or chisel tip is flawed at the factory, the steel will break within minutes of its first deployment. If you notice a clean fracture straight through the collar of a brand-new tool, it should always be reported to the manufacturer for investigation.
A Warning on Re-Sharpened & Reconditioned Tools
It is essential to know that reconditioned or re-pointed tools are not covered by manufacturer warranties. Because these tools have already undergone extensive wear, re-pointing them requires heat that is outside of factory control.
Incorrect heating during field re-sharpening is highly common and usually results in the steel breaking within 4″ of the re-pointed tip. You can easily spot this type of failure because the fracture face will leave a highly glazed, glassy finish. For maximum site safety, the use of field-re-pointed tools is generally not recommended.
Summary Checklist for a Safe Site
To keep your operators safe and your equipment running at peak efficiency, implement these rules on your site:
- Ensure constant, firm downward pressure to avoid mushrooming and blank firing.
- Never utilize the breaker as a pry bar.
- Warm up your tools before striking frozen ground in the winter.
- Frequently inspect and redress bladed tools (like clay spades) to keep their productive geometry.
- Always double-check that your replacement steels are 100% original, ISO-compliant parts that match your machine’s exact specs.
Need Reliable Replacement Breaker Steel?
Don’t let operator errors or substandard tools stall your project. Equip your team with premium, ISO-compliant breaker steel built to withstand the toughest job sites.
Contact the Pneumatics Now sales team today to find the exact match for your machinery and keep your job site safe and efficient.